Canvas basics
Place, connect and configure blocks, undo changes, save an image or a JSON file, and the keyboard shortcuts.
This page covers the controls on the canvas. Nothing here needs Pro.
Place blocks
A block is one unit of the strategy, such as an indicator, a condition or an order. There are four ways to add one.
- Open the palette with the grid button in the header if it is closed, then drag a block from the Nodes palette on the left onto the canvas.
- Double-click a block in the palette. The Builder puts it near the center of the canvas.
- Right-click an empty part of the canvas and pick a block from the menu. It appears where you clicked.
- Click the + button on a block’s output. The new block is placed next to it and connected to that output.
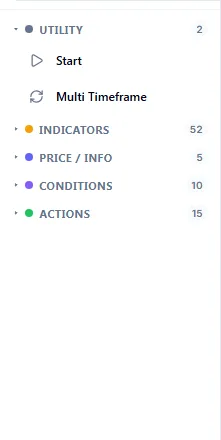
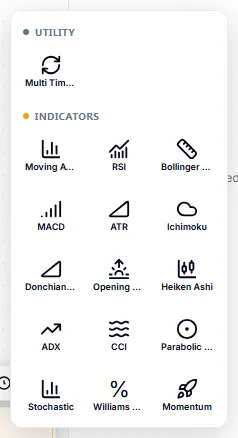
Use the search box above the palette to find a block by name. Ctrl+K moves the cursor to it.
Some blocks, such as Start, can be placed only once. Check E206 flags extra copies; see Validation messages.
Connect blocks
- Find the output dot on the right side of a block.
- Drag from that dot to an input dot on the left side of another block. The + button sits just to the right of the output dot, so you can start the drag from anywhere on the dot.
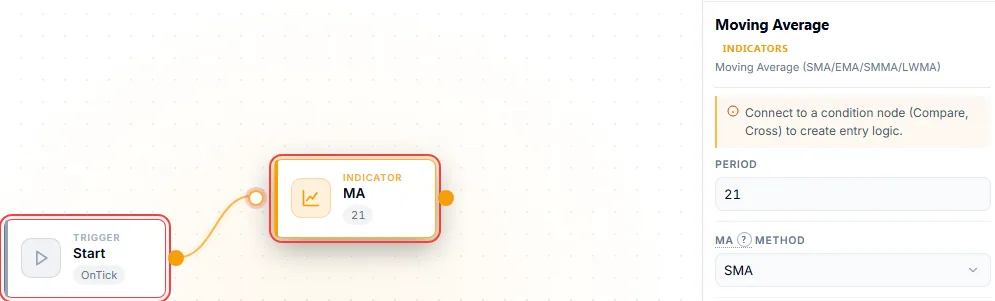
Data flows from left to right. Which blocks to connect, and in which order, is covered in How a strategy flow works.
Configure blocks
- Click a block. The Properties tab on the right shows its settings.
- Change the values. The block on the canvas updates as you type.
A number typed outside its allowed range is moved to the nearest limit.
Options that apply to the whole strategy are in the Settings tab on the right, not on the canvas. Some blocks, such as Pyramiding, Averaging Down and Account Guard, are not placed on the canvas. You switch them on in the Settings tab.
Move around the canvas
| Control | What it does |
|---|---|
| Zoom buttons | Zoom in, zoom out, reset, and Fit All. The current zoom is shown as a percentage. |
| Align button, or G | When on, blocks snap to a grid as you move them. The Builder remembers the choice in this browser. |
Undo and redo
The header has undo and redo buttons. Ctrl+Z undoes the last change and Ctrl+Y redoes it. The Builder keeps the last 30 steps. Opening a project starts a fresh history.
Save an image
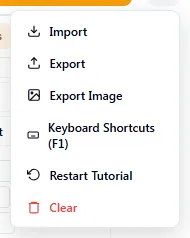
Open the ⋯ menu in the header and choose Export Image. The Builder saves a picture of the canvas.
Save and load a JSON file
A JSON file holds the blocks, the connections and the Settings tab values. It does not contain generated code.
- To save: click Save in the header, or choose Export in the ⋯ menu. Both download
ea-flow.json. - To load: choose Import in the ⋯ menu and pick a JSON file. A file that is not a Builder flow is refused with “Invalid file: missing drawflow data”, and nothing is loaded. “Flow imported” appears only when the flow was loaded. Blocks the Builder does not know are skipped with a message.
Clear in the ⋯ menu empties the canvas after you confirm.
Where your work is kept between visits is covered in Projects.
Guided tour
An empty canvas offers Take the 3-min tour. The ⋯ menu has Restart Tutorial. The tour loads the MA Crossover template and has five steps: Node Palette, Flow Canvas, Property Panel, Download the source and Connect Nodes. The Property Panel step says that the generated source comes with a Pro export. It replaces the flow on the canvas, so start it on an empty canvas.
Keyboard shortcuts
Shortcuts do not work while the cursor is in a text box, a number box or a drop-down. Ctrl+K is the exception. On a Mac, Cmd works in place of Ctrl.
| Keys | What it does |
|---|---|
Ctrl+Z | Undo |
Ctrl+Y or Ctrl+Shift+Z | Redo |
Ctrl+C | Copy the selected block |
Ctrl+V | Paste the copied block |
Ctrl+D | Duplicate the selected block |
Delete or Backspace | Delete the selected block |
Ctrl+S | Save. Signed in with a project open, it saves the project to your account. Otherwise it saves in this browser. |
Ctrl+E | Download the code (Pro only; without Pro the paywall opens) |
Ctrl+K | Jump to the palette search box |
G | Turn grid snapping on or off |
? | Open or close the Help panel |
F1 | Open or close the list of keyboard shortcuts |
Esc | Close the Help panel or the shortcut list |
The in-app list opened with F1 and the Help panel show a shorter list. This table follows the keys the Builder actually handles.